Difference between revisions of "Ant Hell Memorial Dungeon"
Jump to navigation
Jump to search
Njosefbeck (talk | contribs) |
|||
| (5 intermediate revisions by 2 users not shown) | |||
| Line 33: | Line 33: | ||
* You have 1 hour to complete the instance. | * You have 1 hour to complete the instance. | ||
* There are two modes to the instance, Easy Mode & Hard Mode. Different rewards are given depending on the mode, and the monsters are more difficult in Hard Mode. | * There are two modes to the instance, Easy Mode & Hard Mode. Different rewards are given depending on the mode, and the monsters are more difficult in Hard Mode. | ||
| − | * | + | * After completing the instance, every player in the party can click the Treasure Chest to receive their rewards. |
| − | * | + | * If there are multiple characters from one Master Account in the instance, only one of them can claim the rewards. |
| + | * After completing a Hard Mode MD, each player can individually choose if they would like to receive Easy or Hard Mode rewards. | ||
* '''If players disconnect or crash while in a Memorial Dungeon instance, they will be warped back to the instance as soon as they are logged in. However, this won't happen if the player waits for more than 3 minutes or the player was dead on disconnect/crash. If a player dies and respawns they will not be able to re-enter the instance.''' | * '''If players disconnect or crash while in a Memorial Dungeon instance, they will be warped back to the instance as soon as they are logged in. However, this won't happen if the player waits for more than 3 minutes or the player was dead on disconnect/crash. If a player dies and respawns they will not be able to re-enter the instance.''' | ||
| Line 49: | Line 50: | ||
== Instance Rewards == | == Instance Rewards == | ||
| − | For more information about the uses for Shimmering Crystal, Azure Crystal, Jello Shards, Bloody Ruby, and | + | For more information about the uses for Shimmering Crystal, Azure Crystal, Jello Shards, Bloody Ruby, and Mythril Ore see our [[Memorial Dungeon Equipment]] page. |
=== Easy Mode === | === Easy Mode === | ||
| − | |||
| − | |||
{| class="wikitable" | {| class="wikitable" | ||
| − | |||
| − | |||
|- | |- | ||
| − | ! | + | ! Item !! Item Quantity Range |
|- | |- | ||
| − | | {{Item List |id=25424 |item=Shimmering Crystal |simple=yes}} | + | | {{Item List |id=25424 |item=Shimmering Crystal |simple=yes}} || 1 ~ 4 |
|- | |- | ||
| − | | {{Item List |id=25475 |item=Azure Crystal |simple=yes}} || | + | | {{Item List |id=25475 |item=Azure Crystal |simple=yes}} || 2 ~ 8 |
|- | |- | ||
| − | | {{Item List |id=23649 |item=Jello Shard Box |simple=yes}} || 0 ~ | + | | {{Item List |id=23649 |item=Jello Shard Box |simple=yes}} || 0 ~ 1 |
|} | |} | ||
| − | ==== | + | === Hard Mode === |
| − | |||
{| class="wikitable" | {| class="wikitable" | ||
|- | |- | ||
| − | ! Item !! Item Quantity Range | + | ! Item !! Item Quantity Range |
|- | |- | ||
| − | | {{Item List |id=25424 |item=Shimmering Crystal |simple=yes}} || | + | | {{Item List |id=25424 |item=Shimmering Crystal |simple=yes}} || 2 ~ 6 |
|- | |- | ||
| − | | {{Item List |id= | + | | {{Item List |id=25460 |item=Bloody Ruby |simple=yes}} || 0 ~ 3 |
|- | |- | ||
| − | | {{Item List |id= | + | | {{Item List |id=25429 |item=Mythril Ore |simple=yes}} || 1 ~ 2 |
| − | |||
| − | |||
| − | |||
| − | |||
| − | |||
| − | |||
|- | |- | ||
| − | + | | {{Item List |id=757 |item=Rough Elunium |simple=yes}} || 0 ~ 4 | |
| − | |||
| − | |||
| − | |||
| − | |||
| − | |||
| − | |||
| − | |||
| − | | {{Item List |id=757 |item=Rough Elunium |simple=yes}} || | ||
| − | |||
| − | |||
| − | |||
| − | |||
| − | |||
| − | |||
| − | |||
| − | |||
| − | |||
| − | |||
| − | |||
| − | |||
| − | |||
| − | |||
| − | |||
| − | |||
| − | |||
| − | |||
| − | |||
| − | |||
|- | |- | ||
| − | + | | {{Item List |id=756 |item=Rough Oridecon |simple=yes}} || 0 ~ 4 | |
|- | |- | ||
| − | | {{Item List |id= | + | | {{Item List |id=985 |item=Elunium |simple=yes}} || 1 ~ 2 |
|- | |- | ||
| − | | {{Item List |id= | + | | {{Item List |id=984 |item=Oridecon |simple=yes}} || 1 ~ 2 |
|- | |- | ||
| − | | {{Item List |id= | + | | {{Item List |id=25475 |item=Azure Crystal |simple=yes}} || 1 ~ 3 |
|} | |} | ||
{{Navbox Instance}} | {{Navbox Instance}} | ||
Latest revision as of 18:53, 28 August 2022
| Ant Hell Memorial Dungeon | |
|---|---|
| Requirements | |
| Base Level: | 70+ |
| Party: | 1+ Members |
| Rewards | |
| Item(s): | Shimmering Crystal, Jello Fragment Box, Bloody Ruby, Azure Crystal, Ores |
General Info


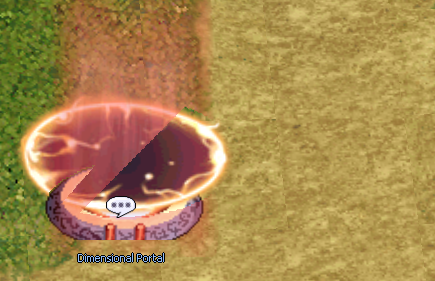
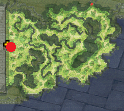
The Ant Hell Memorial Dungeon instance is located on the map one east of Prontera at . Speak with the Memorial Association NPC while in a party to start the instance. Once the Memorial Association NPC starts the instance, you can talk to the Dimensional Portal next to her to actually enter the instance.

- You must be at least base 70.
- You can only do it once a day.
- You have 1 hour to complete the instance.
- There are two modes to the instance, Easy Mode & Hard Mode. Different rewards are given depending on the mode, and the monsters are more difficult in Hard Mode.
- After completing the instance, every player in the party can click the Treasure Chest to receive their rewards.
- If there are multiple characters from one Master Account in the instance, only one of them can claim the rewards.
- After completing a Hard Mode MD, each player can individually choose if they would like to receive Easy or Hard Mode rewards.
- If players disconnect or crash while in a Memorial Dungeon instance, they will be warped back to the instance as soon as they are logged in. However, this won't happen if the player waits for more than 3 minutes or the player was dead on disconnect/crash. If a player dies and respawns they will not be able to re-enter the instance.
Once inside the instance, you must stop the toxic fuming geyser and then kill the boss!
Monsters
Instance Rewards
For more information about the uses for Shimmering Crystal, Azure Crystal, Jello Shards, Bloody Ruby, and Mythril Ore see our Memorial Dungeon Equipment page.
Easy Mode
| Item | Item Quantity Range |
|---|---|
| 1 ~ 4 | |
| 2 ~ 8 | |
| 0 ~ 1 |
Hard Mode
| Item | Item Quantity Range |
|---|---|
| 2 ~ 6 | |
| 0 ~ 3 | |
| 1 ~ 2 | |
| 0 ~ 4 | |
| 0 ~ 4 | |
| 1 ~ 2 | |
| 1 ~ 2 | |
| 1 ~ 3 |
| Instances | |||
|---|---|---|---|
| Daily | Poring Village • Orc's Memory • Prontera Culvert • Ant Hell • Izlude Waterway • Sunken Ship • Odin's Temple of Glory | ||