Kunlun: Difference between revisions
(→NPCs) |
Tag: Manual revert |
||
| (80 intermediate revisions by 3 users not shown) | |||
| Line 1: | Line 1: | ||
__TOC__ | |||
=About Kunlun= | [[File:Map mid Kun.png|center]] | ||
==About Kunlun== | |||
Kunlun (aka Gonryun) is the third localized location added to kRO Zero after Louyang and Amatsu. Styled after ancient Taiwan, Kunlun is home to a field and dungeon.<br> | |||
This update brings new weapons, new craftable gear, and new quests. On kRO Zero it's primarily used for its 90+ Daily Quests. | |||
[[ | ==Story== | ||
A foreigner who arrives in [[Alberta]] is escorted to [[Prontera]]. After hearing about a civilization, King Tristan III orders a crew to sail and find this place. Despite all the hardships, the crew members finally establish a sea route to this newfound civilization. To this day, many people come and go to this new land. A place known for its stunning tourist attractions, sceneries, deep religious roots and impressive economic conditions. Despite their technological advancements, the people of Kunlun are a rather superstitious lot, worshipping deities known as "Hermits". These Hermits are an absolute power unto themselves, controlling human existence and limitations. Anyone can become a Hermit. The natives of Kunlun strived for perfection, believing that if they are good enough and work hard enough to achieve enlightenment, their souls would someday become one with the Hermits. | |||
Unfortunately, not all who become Hermits remain good. Some are overwhelmed by their divinity, ending up being corrupted by it. They would use their power to do whatever they wish, regardless of how harmful or malicious the acts are. Neighboring cities and villages sometimes fear that these evil beings, now known as Evil Cloud Hermits, might someday upset the balance and cause great disasters for Kunlun. | |||
==Entrance== | |||
[[File:Guy.png]]<br> | |||
<br> | |||
The NPC to get to Kunlun is in Alberta {{navi|alberta|246|42}} . It costs 10,000 Zeny and the character must be Base Level 90+ to take the ship there. | |||
==Buddhist Gem Exchange== | |||
Just like Amatsu and Louyang, Kunlun has a special item called a {{Item List|id=1000020|item=Buddhist Gem|simple=yes}} that's used for a variety of purposes. These gems are dropped by monsters. | |||
===Kunlun Weapon Exchange=== | |||
Kunlun weapons increase damage against Demi-human race and Shadow property monsters. At +9, the damage increase is +20%. These weapons can also be enchanted. You can exchange 20 {{Item List|id=1000020|item=Buddhist Gem|simple=yes}} at the NPC at Gonryun {{navi|gonryun|201|153}} to buy a specific weapon. | |||
===Kunlun Weapons=== | |||
* {{Item List|id=500002|item=Buddhist Sword|simple=yes}} | |||
* {{Item List|id=610002|item=Buddhist Katar|simple=yes}} | |||
* {{Item List|id=700002|item=Buddhist Bow|simple=yes}} | |||
* {{Item List|id=510003|item=Buddhist Dagger|simple=yes}} | |||
* {{Item List|id=600003|item=Buddhist Greatsword|simple=yes}} | |||
* {{Item List|id=570001|item=Buddhist Guitar|simple=yes}} | |||
* {{Item List|id=580001|item=Buddhist Whipe|simple=yes}} | |||
* {{Item List|id=560001|item=Buddhist Claw|simple=yes}} | |||
* {{Item List|id=540002|item=Buddhist Book|simple=yes}} | |||
* {{Item List|id=550003|item=Buddhist Staff|simple=yes}} | |||
* {{Item List|id=510004|item=Buddhist Asura|simple=yes}} | |||
* {{Item List|id=590001|item=Buddhist Mace|simple=yes}} | |||
* {{Item List|id=620000|item=Buddhist Axe|simple=yes}} | |||
* {{Item List|id=630000|item=Buddhist Spear|simple=yes}} | |||
=== Refining Kunlun Weapons === | |||
== | The same NPC where you purchase the weapons also sells refine boxes, which will safely refine your weapon to +7. Each refine box costs 50 {{Item List|id=1000020|item=Buddhist Gem|simple=yes}}. | ||
A | |||
===Kunlun Headgear Exchange=== | |||
By exchanging certain materials with the NPC at Gonryun {{navi|gonryun|137|110}} you can make two MATK-oriented headgears. | |||
{| class="wikitable" style="text-align: center;" | |||
|- | |||
! style="background-color:black; color:white"|Headgear | |||
! style="background-color:black; color:white"|Ingredient A | |||
! style="background-color:black; color:white"|Ingredient B | |||
|- | |||
| {{Item List|id=400004|item=Evil Snake Lord Cap|simple=yes}} || {{Item List|id=7167|num=300|item=Strange Steel Piece|simple=yes}} <br> {{Item List|id=25430|num=5|item=Mythril|simple=yes}} <br> {{Item List|id=1000021|num=10|item=Snake Lord Token|simple=yes}} <br> {{Item List|id=7166|num=300|item=Soft Silk|simple=yes}} <br> {{Item List|id=7168|num=500|item=Giant Butterfly Wing Piece|simple=yes}} <br> {{Item List|id=1000020|num=200|item=Buddhist Gem|simple=yes}} || {{Item List|id=7167|num=300|item=Strange Steel Piece|simple=yes}} <br> {{Item List|id=25430|num=5|item=Mythril|simple=yes}} <br> {{Item List|id=7166|num=300|item=Soft Silk|simple=yes}} <br> {{Item List|id=7168|num=500|item=Giant Butterfly Wing Piece|simple=yes}} <br> {{Item List|id=1000020|num=1200|item=Buddhist Gem|simple=yes}} | |||
|- | |||
| {{Item List|id=400005|item=Evil Snake Lord Manteau|simple=yes}} || {{Item List|id=7165|num=300|item=Transparent Celestial Robe|simple=yes}} <br> {{Item List|id=7161|num=200|item=Black Bear Skin|simple=yes}} <br> {{Item List|id=25430|num=2|item=Mythril|simple=yes}} <br> {{Item List|id=7162|num=300|item=Cloud Crumb|simple=yes}} <br> {{Item List|id=7164|num=200|item=Solid Peach|simple=yes}} <br> {{Item List|id=1000020|num=300|item=Buddhist Gem|simple=yes}} ||<div style="text-align: center;">—</div> | |||
|} | |||
=== Kunlun Random Options Item Exchange === | |||
Exchange 1 {{Item List|id=1000020|item=Buddhist Gem|simple=yes}} or 150,000 Zeny with the NPC at Gonryun {{navi|gonryun|141|113}} to get either a Taegeuk Plate (Physical) or a Taegeuk Plate (Magic). These items can be used to give random options to the Kunlun weapons. | |||
=== Random Options === | |||
* Both Enchanting Plates can be used for all Kunlun weapons. | |||
* The second option is not always granted. | |||
* The pool of options are the same as those used for Louyang and Amatsu weapons. | |||
* Double clicking a Plate will open up the Random Option UI. Within that interface you will be able to select the Kunlun weapon and enchant it, as show in the image below.<br> | |||
[[File:Enchanting.png|none]]<br> | |||
<big>'''Option 1'''</big><br> | |||
{| class="wikitable" style="display: inline-table" | |||
|+ Physical | |||
|- | |||
! style="background-color:black; color:white"|Option | |||
! style="background-color:black; color:white"|Values | |||
|- | |||
| <div style="text-align: center;">Max HP+</div> || <div style="text-align: center;">100 ~ 400</div> | |||
|- | |||
| <div style="text-align: center;">Max SP+</div> || <div style="text-align: center;">20 ~ 100</div> | |||
|- | |||
| <div style="text-align: center;">STR+</div> || <div style="text-align: center;">1 ~ 5</div> | |||
|- | |||
| <div style="text-align: center;">AGI+</div> || <div style="text-align: center;">1 ~ 5</div> | |||
|- | |||
| <div style="text-align: center;">VIT+</div> || <div style="text-align: center;">1 ~ 5</div> | |||
|- | |||
| <div style="text-align: center;">DEX+</div> || <div style="text-align: center;">1 ~ 5</div> | |||
|- | |||
| <div style="text-align: center;">ASPD+</div> || <div style="text-align: center;">1 ~ 2</div> | |||
|- | |||
| <div style="text-align: center;">ATK+</div> || <div style="text-align: center;">20 ~ 55</div> | |||
|- | |||
| <div style="text-align: center;">HIT+</div> || <div style="text-align: center;">10 ~ 30</div> | |||
|- | |||
| <div style="text-align: center;">Flee+</div> || <div style="text-align: center;">10 ~ 30</div> | |||
|- | |||
| <div style="text-align: center;">CRIT+</div> || <div style="text-align: center;">5 ~ 10</div> | |||
|- | |||
| <div style="text-align: center;">Increased restorartion gained from Healing Skills by (%)</div> || <div style="text-align: center;">10 ~ 20</div> | |||
|} | |||
{| class="wikitable" style="display: inline-table" | |||
|+ Magical | |||
|- | |||
! style="background-color:black; color:white"|Option | |||
! style="background-color:black; color:white"|Values | |||
|- | |||
| <div style="text-align: center;">Max HP+</div> || <div style="text-align: center;">100 ~ 400</div> | |||
|- | |||
| <div style="text-align: center;">Max SP+</div> || <div style="text-align: center;">20 ~ 100</div> | |||
|- | |||
| <div style="text-align: center;">INT+</div> || <div style="text-align: center;">1 ~ 5</div> | |||
|- | |||
| <div style="text-align: center;">AGI+</div> || <div style="text-align: center;">1 ~ 5</div> | |||
|- | |||
| <div style="text-align: center;">VIT+</div> || <div style="text-align: center;">1 ~ 5</div> | |||
|- | |||
| <div style="text-align: center;">DEX+</div> || <div style="text-align: center;">1 ~ 5</div> | |||
|- | |||
| <div style="text-align: center;">ASPD+</div> || <div style="text-align: center;">1 ~ 2</div> | |||
|- | |||
| <div style="text-align: center;">MATK+</div> || <div style="text-align: center;">20 ~ 55</div> | |||
|- | |||
| <div style="text-align: center;">DEF+</div> || <div style="text-align: center;">10 ~ 40</div> | |||
|- | |||
| <div style="text-align: center;">MDEF+</div> || <div style="text-align: center;">1 ~ 4</div> | |||
|- | |||
| <div style="text-align: center;">FLEE+</div> || <div style="text-align: center;">10 ~ 30</div> | |||
|- | |||
| <div style="text-align: center;">Increased Healing Skills by (%)</div> || <div style="text-align: center;">10 ~ 20</div> | |||
|} | |||
<big>'''Option 2'''</big><br> | |||
{| class="wikitable" style="display: inline-table" | |||
|+ Physical | |||
|- | |||
! style="background-color:black; color:white"|Option | |||
! style="background-color:black; color:white"|Values | |||
|- | |||
| <div style="text-align: center;">ATK+ (%)</div> || <div style="text-align: center;">5 ~ 10</div> | |||
|- | |||
| <div style="text-align: center;">ASPD+ (%)</div> || <div style="text-align: center;">7 ~ 16</div> | |||
|- | |||
| <div style="text-align: center;">Increases Physical Damage to Small-Size monsters by (%)</div> || <div style="text-align: center;">5 ~ 15</div> | |||
|- | |||
| <div style="text-align: center;">Increases Physical Damage to Medium-Size monsters by (%)</div> || <div style="text-align: center;">5 ~ 15</div> | |||
|- | |||
| <div style="text-align: center;">Increases Physical Damage to Large-Size monsters by (%)</div> || <div style="text-align: center;">5 ~ 15</div> | |||
|- | |||
| <div style="text-align: center;">Increases Critical Damage by (%)</div> || <div style="text-align: center;">10 ~ 20</div> | |||
|- | |||
| <div style="text-align: center;">Increases Ranged Physical attacks Damage by (%)</div> || <div style="text-align: center;">5 ~ 12</div> | |||
|} | |||
{| class="wikitable" style="display: inline-table" | |||
|+ Magical | |||
|- | |||
! style="background-color:black; color:white"|Option | |||
! style="background-color:black; color:white"|Values | |||
|- | |||
| <div style="text-align: center;">MATK+ (%)</div> || <div style="text-align: center;">5 ~ 10</div> | |||
|- | |||
| <div style="text-align: center;">ASPD+ (%)</div> || <div style="text-align: center;">7 ~ 16</div> | |||
|- | |||
| <div style="text-align: center;">Decreases Variable Cast Time by (%)</div> || <div style="text-align: center;">5 ~ 12</div> | |||
|- | |||
| <div style="text-align: center;">Decreases SP Consumption by (%)</div> || <div style="text-align: center;">3 ~ 7</div> | |||
|- | |||
| <div style="text-align: center;">Increases Magical Damage to Small-Size monsters by (%)</div> || <div style="text-align: center;">5 ~ 15</div> | |||
|- | |||
| <div style="text-align: center;">Increases Magical Damage to Medium-Size monsters by (%)</div> || <div style="text-align: center;">5 ~ 15</div> | |||
|- | |||
| <div style="text-align: center;">Increases Magical Damage to Large-Size monsters by (%)</div> || <div style="text-align: center;">5 ~ 15</div> | |||
|}<br> | |||
==Quests== | |||
For all quests, the character must be at least Base Level 90.<br> | |||
<big><big>'''Daily Quests'''</big></big><br> | |||
'''Alberta Merchant - Kejin''' {{navi|gon_fild01|257|95}} | |||
[[File:Npc Kun.png|none]] | |||
*Kezin gives you two quests. | |||
*The first involves turning in Old Ying-Yang Token. | |||
*The second has you turn in Restored Ying-Yang Token.<br> | |||
'''Ghost Hunter - Won Jin Yeon''' {{navi|gonryun|165|195}} | |||
[[ | [[File:Ghost hunter.png|none]] | ||
*Won Jin Yeon gives you four monster kill quests. | |||
*The quests involve killing the following monsters: Dumpling Child, Evil Nymph, Enchanted Peach Tree, and Hermit Plant.<br> | |||
=== | ==Field== | ||
<big>'''Map'''</big> | |||
[[File:KunMap.png|none|500px]] | |||
<big>'''Monsters'''</big> | |||
{| class=wikitable style="font-family:nanumgothic; text-align:center; background:white; width:50%" | |||
| rowspan=4|[[File:BABY LEOPARD.gif]] | |||
| style="background-color:black; color:white"|Lv | |||
| 68 | |||
| rowspan=4|[[File:Dumpling Child.gif]] | |||
| style="background-color:black; color:white"|Lv | |||
| 60 | |||
| rowspan=4|[[File:Dumpling Child.gif]] | |||
| style="background-color:black; color:white"|Lv | |||
| 60 | |||
|- | |||
| style="background-color:black; color:white"|HP | |||
| 6.096 | |||
| style="background-color:black; color:white"|HP | |||
| 4.970 | |||
| style="background-color:black; color:white"|HP | |||
| 24.850 | |||
|- | |||
| style="background-color:black; color:white"|Size | |||
| Small | |||
| style="background-color:black; color:white"|Size | |||
| Small | |||
| style="background-color:black; color:white"|Size | |||
| Small | |||
|- | |||
|style="background-color:black; color:white"|Type | |||
| Normal | |||
| style="background-color:black; color:white"|Type | |||
| Normal | |||
| style="background-color:black; color:white"|Type | |||
| Champion | |||
|- | |||
| <span style="font-weight:bold">{{monster|id=1415 Baby Leopard}}</span> | |||
| Ghost 1 | |||
| Brute | |||
| <span style="font-weight:bold">{{monster|id=1409 Dumpling Child}}</span> | |||
| Neutral 1 | |||
| Demi-Human | |||
| <span style="font-weight:bold">{{monster|id=2683 Ringleader Dumpling Child}}</span> | |||
| Neutral 1 | |||
| Demi-Human | |||
|} | |||
<br> | |||
<big>'''Items & Equipment Dropped'''</big> | |||
{| class="wikitable" style="text-align: center; background-color:white; font-family:nanumgothic" | |||
|- | |||
! style="background-color:black; color:white"|Item | |||
! style="background-color:black; color:white"|Dropped by | |||
|- | |||
|[[File:Buddhist Gem.png|none]]Buddhist Gem || All Field and Dungeon monsters | |||
|- | |||
| [[File:Clown Nose.jpg|none]]Clown Nose || Dumpling Child <br> Dumpling Child Ringleader | |||
|- | |||
| [[File:Dagger.jpg|none]]Dagger [3] || Baby Leopard | |||
|}<br> | |||
{{ | ==Dungeon== | ||
<big>'''Map'''</big><br> | |||
The Entrance of the Dungeon is in the center of Kunlun. | |||
[[File:Dun.png|none|700px]]<br> | |||
<big>'''Monsters'''</big><br> | |||
{| class=wikitable style="font-family:nanumgothic; text-align:center; background:transparent; width:100%" | |||
| rowspan=4|[[File:YELLOW PLANT.gif]] | |||
| style="background-color:black; color:white"|Lv | |||
| 1 | |||
| rowspan=4|[[File:RED PLANT.gif]] | |||
| style="background-color:black; color:white"|Lv | |||
| 1 | |||
| rowspan=4|[[File:LIVE PEACH TREE.gif]] | |||
| style="background-color:black; color:white"|Lv | |||
| 92 | |||
| rowspan=4|[[File:LIVE PEACH TREE.gif]] | |||
| style="background-color:black; color:white"|Lv | |||
| 92 | |||
| rowspan=4|[[File:BLOOD BUTTERFLY.gif]] | |||
| style="background-color:black; color:white"|Lv | |||
| 94 | |||
| rowspan=4|[[File:BLOOD BUTTERFLY.gif]] | |||
| style="background-color:black; color:white"|Lv | |||
| 94 | |||
|- | |||
| style="background-color:black; color:white"|HP | |||
| 5 | |||
| style="background-color:black; color:white"|HP | |||
| 6 | |||
| style="background-color:black; color:white"|HP | |||
| 18.787 | |||
| style="background-color:black; color:white"|HP | |||
| 187.870 | |||
| style="background-color:black; color:white"|HP | |||
| 19.446 | |||
| style="background-color:black; color:white"|HP | |||
| 97.230 | |||
|- | |||
| style="background-color:black; color:white"|Size | |||
| Small | |||
| style="background-color:black; color:white"|Size | |||
| Small | |||
| style="background-color:black; color:white"|Size | |||
| Medium | |||
| style="background-color:black; color:white"|Size | |||
| Medium | |||
| style="background-color:black; color:white"|Size | |||
| Medium | |||
| style="background-color:black; color:white"|Size | |||
| Medium | |||
|- | |||
|style="background-color:black; color:white"|Type | |||
| Normal | |||
| style="background-color:black; color:white"|Type | |||
| Normal | |||
|style="background-color:black; color:white"|Type | |||
| Normal | |||
| style="background-color:black; color:white"|Type | |||
| Champion | |||
|style="background-color:black; color:white"|Type | |||
| Normal | |||
| style="background-color:black; color:white"|Type | |||
| Champion | |||
|- | |||
| <span style="font-weight:bold">{{monster|id=1081 Yellow Plant}}</span> | |||
| Earth 1 | |||
| Plant | |||
| <span style="font-weight:bold">{{monster|id=1078 Red Plant}}</span> | |||
| Earth 1 | |||
| Plant | |||
| <span style="font-weight:bold">{{monster|id=1410 Enchanted Peach Tree}}</span> | |||
| Earth 2 | |||
| Plant | |||
| <span style="font-weight:bold">{{monster|id=2775 Solid Enchanted Peach Tree}}</span> | |||
| Earth 2 | |||
| Plant | |||
| <span style="font-weight:bold">{{monster|id=1408 Bloody Butterfly}}</span> | |||
| Wind 2 | |||
| Insect | |||
| <span style="font-weight:bold">{{monster|id=2883 Swift Bloody Butterfly}}</span> | |||
| Wind 2 | |||
| Insect | |||
|- | |||
| rowspan=4|[[File:ZIPPER BEAR.gif]] | |||
| style="background-color:black; color:white"|Lv | |||
| 90 | |||
| rowspan=4|[[File:WILD GINSENG.gif]] | |||
| style="background-color:black; color:white"|Lv | |||
| 90 | |||
| rowspan=4|[[File:EVIL CLOUD HERMIT.gif]] | |||
| style="background-color:black; color:white"|Lv | |||
| 96 | |||
| rowspan=4|[[File:WICKED NYMPH.gif]] | |||
| style="background-color:black; color:white"|Lv | |||
| 97 | |||
| rowspan=4|[[File:WICKED NYMPH.gif]] | |||
| style="background-color:black; color:white"|Lv | |||
| 97 | |||
| rowspan=4|[[File:DARK SNAKE LORD.gif]] | |||
| style="background-color:black; color:white"|Lv | |||
| 130 | |||
|- | |||
| style="background-color:black; color:white"|HP | |||
| 15.901 | |||
| style="background-color:black; color:white"|HP | |||
| 15.771 | |||
| style="background-color:black; color:white"|HP | |||
| 21.010 | |||
| style="background-color:black; color:white"|HP | |||
| 21.458 | |||
| style="background-color:black; color:white"|HP | |||
| 107.290 | |||
| style="background-color:black; color:white"|HP | |||
| 3.633.300 | |||
|- | |||
| style="background-color:black; color:white"|Size | |||
| Medium | |||
| style="background-color:black; color:white"|Size | |||
| Small | |||
| style="background-color:black; color:white"|Size | |||
| Large | |||
| style="background-color:black; color:white"|Size | |||
| Medium | |||
| style="background-color:black; color:white"|Size | |||
| Medium | |||
| style="background-color:black; color:white"|Size | |||
| Large | |||
|- | |||
|style="background-color:black; color:white"|Type | |||
| Normal | |||
| style="background-color:black; color:white"|Type | |||
| Normal | |||
|style="background-color:black; color:white"|Type | |||
| Normal | |||
| style="background-color:black; color:white"|Type | |||
| Normal | |||
|style="background-color:black; color:white"|Type | |||
| Champion | |||
| style="background-color:black; color:white"|Type | |||
| Boss | |||
|- | |||
| <span style="font-weight:bold">{{monster|id=1417 Zipper Bear}}</span> | |||
| Dark 1 | |||
| Brute | |||
| <span style="font-weight:bold">{{monster|id=1413 Hermit Plant}}</span> | |||
| Fire 2 | |||
| Plant | |||
| <span style="font-weight:bold">{{monster|id=1412 Taoist Hermit}}</span> | |||
| Neutral 2 | |||
| Formless | |||
| <span style="font-weight:bold">{{monster|id=1416 Evil Nymph}}</span> | |||
| Dark 3 | |||
| Demon | |||
| <span style="font-weight:bold">{{monster|id=2617 Elusive Evil Nymph}}</span> | |||
| Dark 3 | |||
| Demon | |||
| <span style="font-weight:bold">{{monster|id=1418 Evil Snake Lord}}</span> | |||
| Ghost 3 | |||
| Brute | |||
|} | |||
<br> | |||
<big>'''Items & Equipment Dropped'''</big> | |||
{| class="wikitable" style="text-align: center; background-color:white; font-family:nanumgothic;" | |||
|- | |||
! style="background-color:black; color:white"|Item | |||
! style="background-color:black; color:white"|Dropped by | |||
! style="background-color:black; color:white"|Has Random Options | |||
|- | |||
| [[File:Old yin yang.jpg|none]]Old Ying-Yang Token || Enchanted Peach Tree || - | |||
|- | |||
| [[File:Peach.jpg|none]]Solid Peach || Enchanted Peach Tree || - | |||
|- | |||
| [[File:Strange steel.jpg|none]]Strange Steel Piece || Zipper Bear || - | |||
|- | |||
|[[File:Black bear.jpg|none]]Black Bear Skin || Zipper Bear || - | |||
|- | |||
| [[File:Lariat.jpg|none]]Lariat || Bloody Butterfly <br> Swift Bloody Butterfly || Yes, Lvl 61-99 Weapon Random Options | |||
|- | |||
| [[File:Demon ear wings.jpg|none]]Demon Wing Ears || Hermit Plant || No | |||
|- | |||
|[[File:Cloud crumb.jpg|none]] Cloud Crumb || Taoist Hermit || - | |||
|- | |||
| [[File:Katar.jpg|none]]Poison Demon Katar [1] || Taoist Hermit || Yes, Fever Dungeon Weapon Random Options | |||
|- | |||
| [[File:Restored yin yang.jpg|none]]Restored Ying-Yang Token || Evil Nymph <br> Hermit Plant || - | |||
|- | |||
| [[File:Taoist sword.jpg|none]]Taoist Sword [1] || Evil Nymph || Yes, Fever Dungeon Weapon Random Options | |||
|- | |||
|[[File:Hellfire.jpg|none]] Hellfire || Evil Snake Lord || Yes, Fever Dungeon Weapon Random Options | |||
|- | |||
| [[File:Gae bolg.jpg|none]]Gae Bolg || Evil Snake Lord || Yes, Fever Dungeon Weapon Random Options | |||
|- | |||
| [[File:Snake lord token.jpg|none]]Snake Lord Token || Evil Snake Lord || - | |||
|- | |||
| [[File:Gravekeepr.jpg|none]]Grave Keeper's Sword || Evil Snake Lord || - | |||
|}<br> | |||
Latest revision as of 00:10, 23 May 2025
About Kunlun
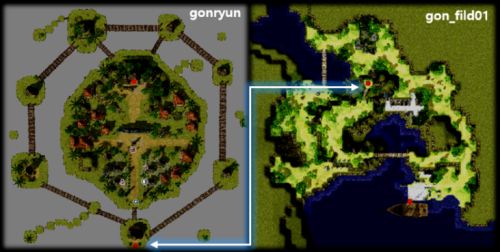
Kunlun (aka Gonryun) is the third localized location added to kRO Zero after Louyang and Amatsu. Styled after ancient Taiwan, Kunlun is home to a field and dungeon.
This update brings new weapons, new craftable gear, and new quests. On kRO Zero it's primarily used for its 90+ Daily Quests.
Story
A foreigner who arrives in Alberta is escorted to Prontera. After hearing about a civilization, King Tristan III orders a crew to sail and find this place. Despite all the hardships, the crew members finally establish a sea route to this newfound civilization. To this day, many people come and go to this new land. A place known for its stunning tourist attractions, sceneries, deep religious roots and impressive economic conditions. Despite their technological advancements, the people of Kunlun are a rather superstitious lot, worshipping deities known as "Hermits". These Hermits are an absolute power unto themselves, controlling human existence and limitations. Anyone can become a Hermit. The natives of Kunlun strived for perfection, believing that if they are good enough and work hard enough to achieve enlightenment, their souls would someday become one with the Hermits.
Unfortunately, not all who become Hermits remain good. Some are overwhelmed by their divinity, ending up being corrupted by it. They would use their power to do whatever they wish, regardless of how harmful or malicious the acts are. Neighboring cities and villages sometimes fear that these evil beings, now known as Evil Cloud Hermits, might someday upset the balance and cause great disasters for Kunlun.
Entrance
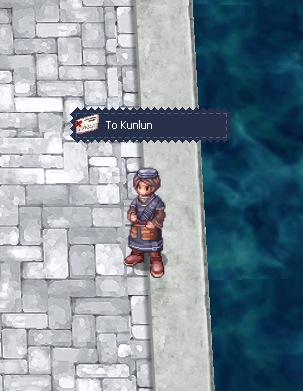
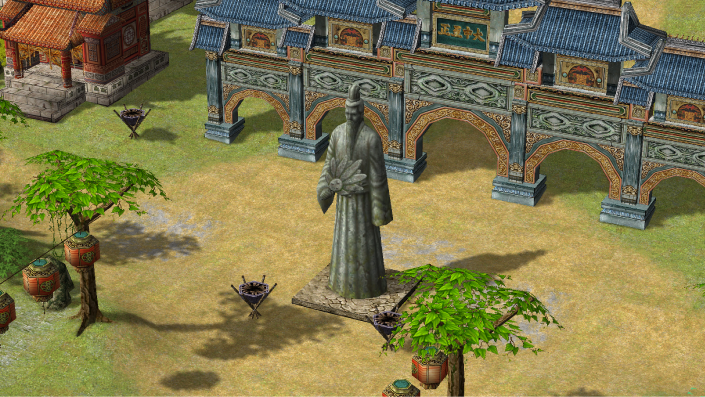
The NPC to get to Kunlun is in Alberta . It costs 10,000 Zeny and the character must be Base Level 90+ to take the ship there.
Buddhist Gem Exchange
Just like Amatsu and Louyang, Kunlun has a special item called a ![]() Buddhist Gem that's used for a variety of purposes. These gems are dropped by monsters.
Buddhist Gem that's used for a variety of purposes. These gems are dropped by monsters.
Kunlun Weapon Exchange
Kunlun weapons increase damage against Demi-human race and Shadow property monsters. At +9, the damage increase is +20%. These weapons can also be enchanted. You can exchange 20 ![]() Buddhist Gem at the NPC at Gonryun to buy a specific weapon.
Buddhist Gem at the NPC at Gonryun to buy a specific weapon.
Kunlun Weapons
 Buddhist Sword
 Buddhist Katar
 Buddhist Bow
 Buddhist Dagger
 Buddhist Greatsword
 Buddhist Guitar
 Buddhist Whipe
 Buddhist Claw
 Buddhist Book
 Buddhist Staff
 Buddhist Asura
 Buddhist Mace
 Buddhist Axe
 Buddhist Spear
Refining Kunlun Weapons
The same NPC where you purchase the weapons also sells refine boxes, which will safely refine your weapon to +7. Each refine box costs 50 ![]() Buddhist Gem.
Buddhist Gem.
Kunlun Headgear Exchange
By exchanging certain materials with the NPC at Gonryun you can make two MATK-oriented headgears.
| Headgear | Ingredient A | Ingredient B |
|---|---|---|
—
|
Kunlun Random Options Item Exchange
Exchange 1 ![]() Buddhist Gem or 150,000 Zeny with the NPC at Gonryun to get either a Taegeuk Plate (Physical) or a Taegeuk Plate (Magic). These items can be used to give random options to the Kunlun weapons.
Buddhist Gem or 150,000 Zeny with the NPC at Gonryun to get either a Taegeuk Plate (Physical) or a Taegeuk Plate (Magic). These items can be used to give random options to the Kunlun weapons.
Random Options
- Both Enchanting Plates can be used for all Kunlun weapons.
- The second option is not always granted.
- The pool of options are the same as those used for Louyang and Amatsu weapons.
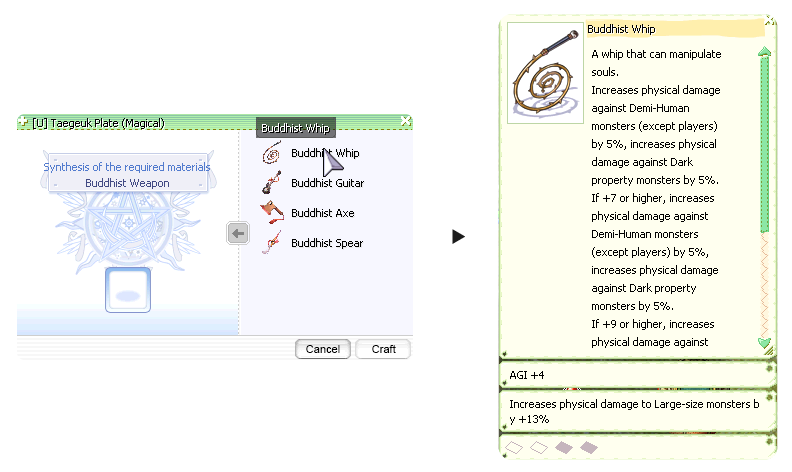
- Double clicking a Plate will open up the Random Option UI. Within that interface you will be able to select the Kunlun weapon and enchant it, as show in the image below.
Option 1
| Option | Values |
|---|---|
Max HP+ |
100 ~ 400
|
Max SP+ |
20 ~ 100
|
STR+ |
1 ~ 5
|
AGI+ |
1 ~ 5
|
VIT+ |
1 ~ 5
|
DEX+ |
1 ~ 5
|
ASPD+ |
1 ~ 2
|
ATK+ |
20 ~ 55
|
HIT+ |
10 ~ 30
|
Flee+ |
10 ~ 30
|
CRIT+ |
5 ~ 10
|
Increased restorartion gained from Healing Skills by (%) |
10 ~ 20
|
| Option | Values |
|---|---|
Max HP+ |
100 ~ 400
|
Max SP+ |
20 ~ 100
|
INT+ |
1 ~ 5
|
AGI+ |
1 ~ 5
|
VIT+ |
1 ~ 5
|
DEX+ |
1 ~ 5
|
ASPD+ |
1 ~ 2
|
MATK+ |
20 ~ 55
|
DEF+ |
10 ~ 40
|
MDEF+ |
1 ~ 4
|
FLEE+ |
10 ~ 30
|
Increased Healing Skills by (%) |
10 ~ 20
|
Option 2
| Option | Values |
|---|---|
ATK+ (%) |
5 ~ 10
|
ASPD+ (%) |
7 ~ 16
|
Increases Physical Damage to Small-Size monsters by (%) |
5 ~ 15
|
Increases Physical Damage to Medium-Size monsters by (%) |
5 ~ 15
|
Increases Physical Damage to Large-Size monsters by (%) |
5 ~ 15
|
Increases Critical Damage by (%) |
10 ~ 20
|
Increases Ranged Physical attacks Damage by (%) |
5 ~ 12
|
| Option | Values |
|---|---|
MATK+ (%) |
5 ~ 10
|
ASPD+ (%) |
7 ~ 16
|
Decreases Variable Cast Time by (%) |
5 ~ 12
|
Decreases SP Consumption by (%) |
3 ~ 7
|
Increases Magical Damage to Small-Size monsters by (%) |
5 ~ 15
|
Increases Magical Damage to Medium-Size monsters by (%) |
5 ~ 15
|
Increases Magical Damage to Large-Size monsters by (%) |
5 ~ 15
|
Quests
For all quests, the character must be at least Base Level 90.
Daily Quests
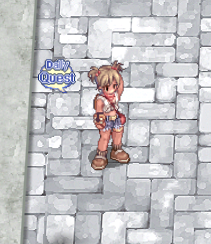
Alberta Merchant - Kejin
- Kezin gives you two quests.
- The first involves turning in Old Ying-Yang Token.
- The second has you turn in Restored Ying-Yang Token.
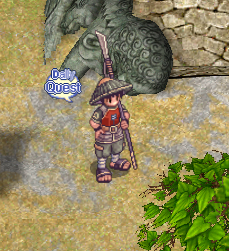
Ghost Hunter - Won Jin Yeon
- Won Jin Yeon gives you four monster kill quests.
- The quests involve killing the following monsters: Dumpling Child, Evil Nymph, Enchanted Peach Tree, and Hermit Plant.
Field
Map
Monsters

|
Lv | 68 | 
|
Lv | 60 | 
|
Lv | 60 |
| HP | 6.096 | HP | 4.970 | HP | 24.850 | |||
| Size | Small | Size | Small | Size | Small | |||
| Type | Normal | Type | Normal | Type | Champion | |||
| Baby Leopard | Ghost 1 | Brute | Dumpling Child | Neutral 1 | Demi-Human | Ringleader Dumpling Child | Neutral 1 | Demi-Human |
Items & Equipment Dropped
| Item | Dropped by |
|---|---|
| Buddhist Gem | All Field and Dungeon monsters |
| Clown Nose | Dumpling Child Dumpling Child Ringleader |
| Dagger [3] | Baby Leopard |
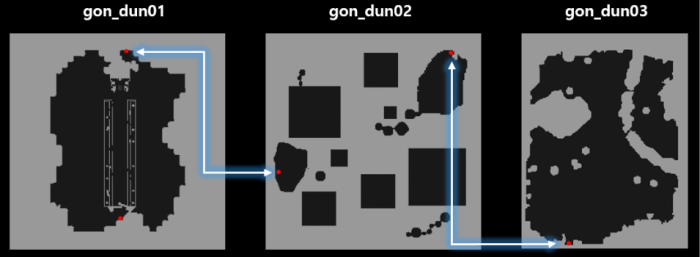
Dungeon
Map
The Entrance of the Dungeon is in the center of Kunlun.
Monsters
| Lv | 1 | Lv | 1 | 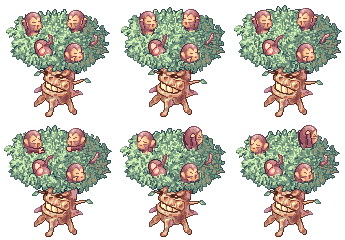
|
Lv | 92 | 
|
Lv | 92 | 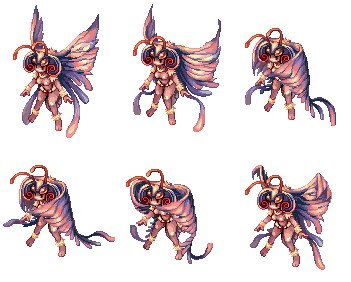
|
Lv | 94 | 
|
Lv | 94 | ||
| HP | 5 | HP | 6 | HP | 18.787 | HP | 187.870 | HP | 19.446 | HP | 97.230 | ||||||
| Size | Small | Size | Small | Size | Medium | Size | Medium | Size | Medium | Size | Medium | ||||||
| Type | Normal | Type | Normal | Type | Normal | Type | Champion | Type | Normal | Type | Champion | ||||||
| Yellow Plant | Earth 1 | Plant | Red Plant | Earth 1 | Plant | Enchanted Peach Tree | Earth 2 | Plant | Solid Enchanted Peach Tree | Earth 2 | Plant | Bloody Butterfly | Wind 2 | Insect | Swift Bloody Butterfly | Wind 2 | Insect |

|
Lv | 90 | 
|
Lv | 90 | 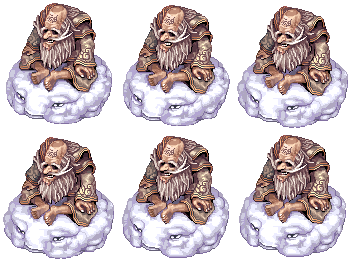
|
Lv | 96 | 
|
Lv | 97 | 
|
Lv | 97 | 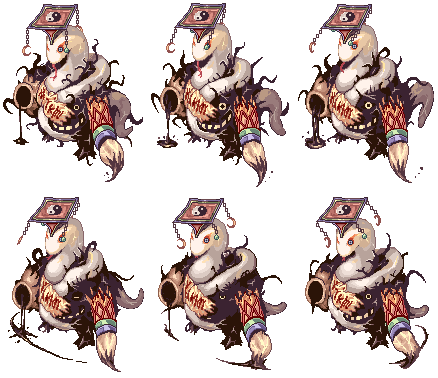
|
Lv | 130 |
| HP | 15.901 | HP | 15.771 | HP | 21.010 | HP | 21.458 | HP | 107.290 | HP | 3.633.300 | ||||||
| Size | Medium | Size | Small | Size | Large | Size | Medium | Size | Medium | Size | Large | ||||||
| Type | Normal | Type | Normal | Type | Normal | Type | Normal | Type | Champion | Type | Boss | ||||||
| Zipper Bear | Dark 1 | Brute | Hermit Plant | Fire 2 | Plant | Taoist Hermit | Neutral 2 | Formless | Evil Nymph | Dark 3 | Demon | Elusive Evil Nymph | Dark 3 | Demon | Evil Snake Lord | Ghost 3 | Brute |
Items & Equipment Dropped
| Item | Dropped by | Has Random Options |
|---|---|---|
| Old Ying-Yang Token | Enchanted Peach Tree | - |
| Solid Peach | Enchanted Peach Tree | - |
| Strange Steel Piece | Zipper Bear | - |
| Black Bear Skin | Zipper Bear | - |
| Lariat | Bloody Butterfly Swift Bloody Butterfly |
Yes, Lvl 61-99 Weapon Random Options |
| Demon Wing Ears | Hermit Plant | No |
| Cloud Crumb | Taoist Hermit | - |
| Poison Demon Katar [1] | Taoist Hermit | Yes, Fever Dungeon Weapon Random Options |
| Restored Ying-Yang Token | Evil Nymph Hermit Plant |
- |
| Taoist Sword [1] | Evil Nymph | Yes, Fever Dungeon Weapon Random Options |
| Hellfire | Evil Snake Lord | Yes, Fever Dungeon Weapon Random Options |
| Gae Bolg | Evil Snake Lord | Yes, Fever Dungeon Weapon Random Options |
| Snake Lord Token | Evil Snake Lord | - |
| Grave Keeper's Sword | Evil Snake Lord | - |
